How to Create Accounts in Badger Maps (iPad)
Badger Maps gives you the flexibility to add new accounts on whatever device you’re using. Here, you’ll learn how to create new accounts using the iPad app.
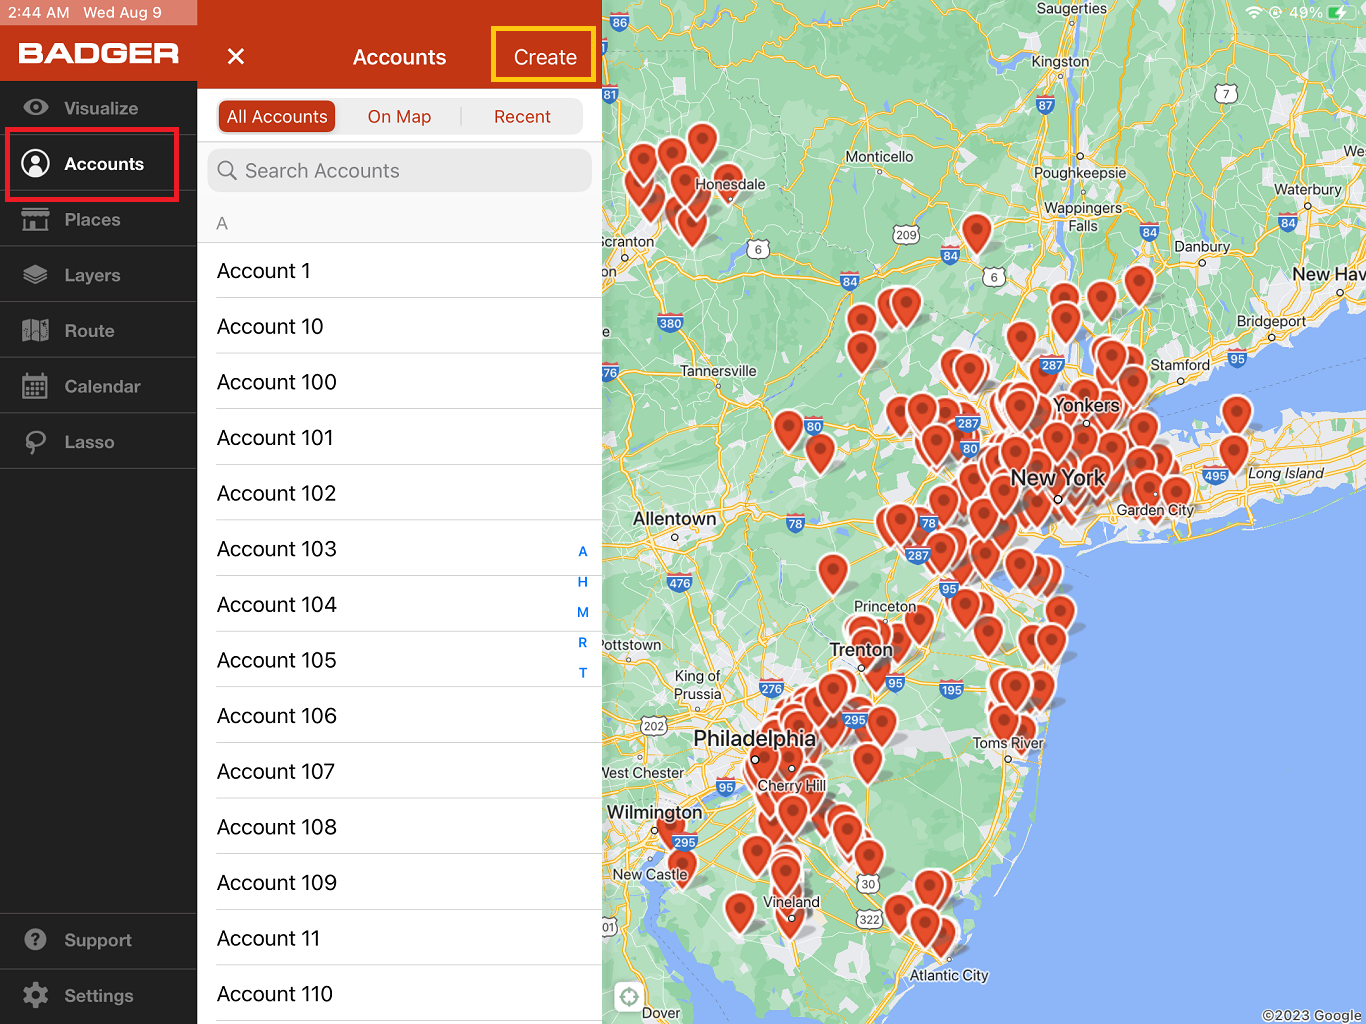
1. Go to Accounts and tap Create.
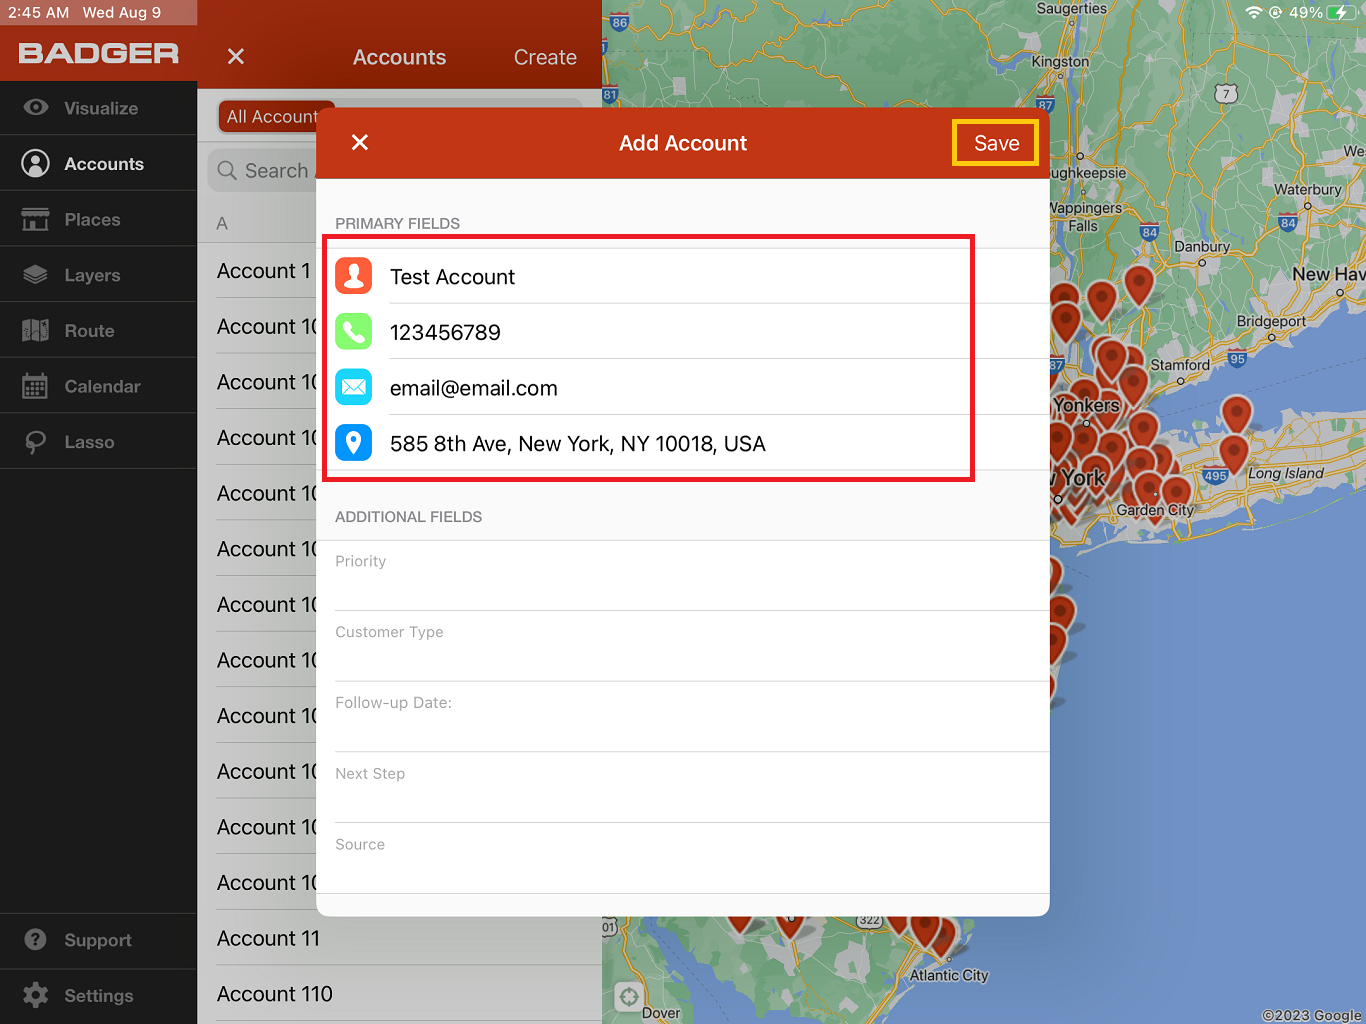
2. After that, the Add Account box will pop up. Fill it out, and then click Save you’re done.
Note: The Name and Address fields are required to be filled out, but the rest are optional. Also, the Additional Fields (e.g. Priority, Customer Type, etc.) that you’re seeing here are just examples. These fields really depend on what you’ll add or have in your imported data.

3. The new account will be shown on the All Accounts list. Click on it if you’d like to view the Account Details. This is where you can make changes or updates on the account.


That’s it. Easy to remember, right? Go ahead and try it now.


